Traditional DIY Renovations

My husband and I are renovating our master bathroom and thought we'd share the experience. We're tearing everything out and starting from scratch. Changing a wall, replacing the shower, installing a steam shower, new cabinets, crown molding, baseboards, trim, lights and mirror. I hope you'll join us on our adventure! In case you're not familiar with blogs (like me) I'd like to remind you to start with the bottom blog (the earliest post) and work your way up.

My Photo
Name:
Location: California, United States

Friday, November 11, 2011

Before and After Pictures

Before...


And after...


Need I say more?

Our Journey's End!

Finally, we are at the end of our journey. Although it was hard work, I can't tell you how much pleasure we've found working through this.  To take a blank canvas, then brainstorm about what we want and then to see it come to fruition...wow!

Here are some close up pictures of the shower (http://www.americanbathfactory.com/), the lights (http://www.homedepot.com/), the vanity and the Apothecary (American Bath Factory), plus the sinks and faucets (American Bath Factory)...


The mirror was probably the most difficult item to find. Because we decided to shorten our vanity length in order to include the Apothecary Cabinet, it just looked too crowded with two separate mirrors (which was our original intention). Having decided on a single mirror, we measured and went shopping! We found one that fit our dimensions online and ordered it, unfortunately it was hideous! ☺ Time to get in the car and visit our favorite stores.  I must admit it was very much like the story of Goldilocks and the Three Bears without the happy ending of "And it was just right"!  What's that saying? "If you want something right, you've got to do it yourself".  We figured we could use the same molding we used on our border giving us the best of both worlds, it would fit and match! We called around and found some wonderful people at Precision Glass & Mirror (http://www.precision-glassinc.com/) who helped us choose the right dimensions (we had to allow for the lip on the molding), thinkness, and bevel. It was perfect and affordable! They also told us the best way to frame the molding onto the mirror and how to hang it.


As any woman knows, accessories are the key to the final product! So here are our accessories...we didn't want to put a towel bar on our shower glass (although it was available) yet we wanted some towels close to the shower.  We found the "Parisienne Towel Tree" (the curvy wrought iron between the vanity and the shower)  from J.C. Penney online (http://www.jcpenney.com/) as well as the towels to go on it.  We felt it was the right combination of practical and decorative. We visited Bed, Bath and Beyond (http://www.bedbathandbeyond.com/) for most of our accessories including our rugs, soap dispensers, mini towel tree, toilet paper holder, and trash can. I couldn't believe how hard it was to find affordable fingertip towels. Most places (including online) charged from $10 to $20 for one towel! I was prepared to hang washclothes on my mini towel tree when I ran across a great deal from WalMart (http://www.walmart.com)...two/ monogrammed fingertip towels for $5! Yay! ☺ Top it off with some pictures that we already had and hadn't figured out where we wanted to hang them and voilá!

If you want to see the side by side view, I'm going to post it as a separate post all by itself. That way, if you're the type to read the end of the book first, I've made it easy for you!

Thank you for taking the time to read my blog. I hope you've enjoyed reading it as much as I've enjoyed writing it. Now I look at my other bathroom and a light bulb appears over my head...oh, but that's another blog for another time. Please feel free to post your comments here. Every comment gives the blog more exposure and I really would like others to know about the wonderful companies and people who have helped to make our bathroom what it is today.

Labels: , , , , ,

Monday, October 17, 2011

The Final Touches

As I mentioned in the beginning, we actually completed the entire bathroom in about two weeks. It only took one weekend to install the shower not including the steam unit. I wish I were as expedient in my blogging! ☺

So here we are in the final stretch. The next item on the agenda is to paint. We prefer Dunn-Edwards paint (http://www.dunnedwards.com/) because it needs less coats and lasts longer. We may pay a little extra but it's worth it in the long run. We washed the walls with good old fashioned TSP plus a little bleach where we suspected mildrew and since this is a bathroom, we included a coat of Kilz Latex Stainblocker (http://www.kilz.com/). The base coat for the walls was "Jakarta" with a "Garnet Evening" border. We kept the ceiling white to lighten up the room.
We picked up our molding  in the raw from Ganahl Lumber (http://www.ganahllumber.com/) then took a color swatch (from our new Ahqua Chateau vanity) to Vista Paint (http://www.vistapaint.com/) where they matched the stain for us. We applied the stain, let it dry, lots of measuring and cutting, then using our handy, dandy nail gun, up went the crown molding, baseboards and trim.
Now it's time to replace the missing tiles (from removing the old vanity). Unfortunately, we didn't have the foresight to save a few extra tiles when we installed the floor a few years ago. They will still have the vanity over them but since the new vanity doesn't reach the floor (clawfoot), we need something close in color and texture. We couldn't get a perfect match but unless you're crawling on our bathroom floor (heaven forbid) you probably won't notice the difference!

We also replaced the plumbing hardware just to be safe. The house was built in 1989 and it had never been replaced. Seemed like a good time to do it.

Finally we can get back to the shower. The only thing left is to place the glass piece above the doors to keep the steam where it belongs! As you can see we just needed a piece of glass with trim to match the shower. 

We attached the clear rubber edging that was included with the shower kit (to keep the water and steam on the inside of the shower) to the exposed edges.

I've always wanted a sit-down vanity. I looked for just the right one and finally found it from Poundex...the Queen Ann Vanity Set and it was perfect!

We'll I thought I was almost done blogging but with all of these little extra touches, I think I should finish on my next post instead of this one.  See you soon!

Labels: , , , , ,

Wednesday, August 24, 2011

The Shower Install

Okay, time to install the shower. This will probably be my longest post but I wanted to keep it all together.  I was told we could install this shower in a weekend and we did!  Read on to see how easy it was.

Everything was neatly in a box so we opened the box and familiarized ourselves with everything. They also have a shower install video on the www.americanbathfactory.com website which is helpful especially if you're a visual learner (like me).  The first order of business was to be sure everything was clean around the drain.
 Next, we lined up the drain with the pan (that's my husband Arnold).
You might notice that we put in the steam generator at the same time. We wanted to get it connected before we sealed up the wall.  Once the drain is lined up the pan just fits right in.  We used silicone (I think they are all waterproof) underneath just to secure it.  This is also the time to set the frame for our Shampoo Shelf.  We used some of the cardboard from the shower kit box to cover the shower pan since we didn't want to spend time scraping off silicone or paint.
Since we shortened a wall, we also had to reframe it before we could do anything else.  Then we started putting up the hardibacker (cement board) which goes up just like drywall except we used Rock-On Cement Screws.  We also measured and cut-out the space for the Shampoo Shelf.
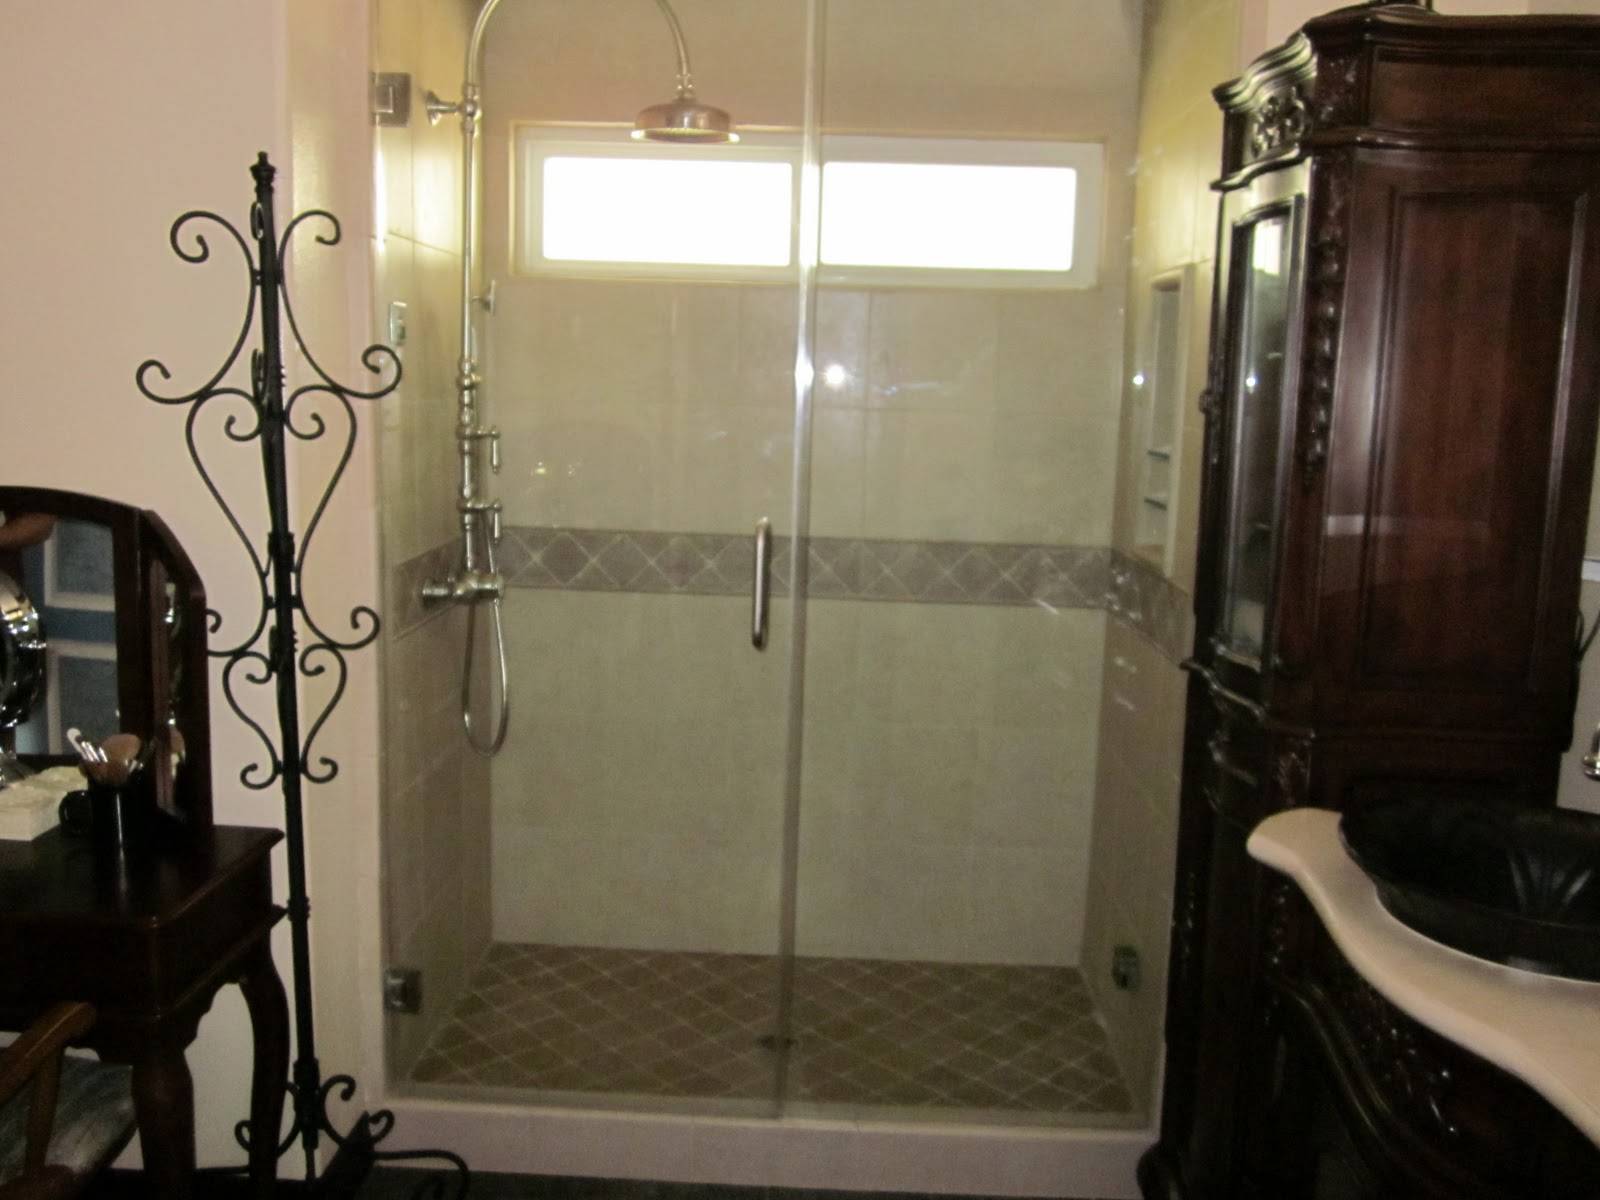
The next step was to place the Sistine Stone panels (yes, I said "panels") which is just too easy! ☺  Our panels were two (2) across and three (3) down.  Since we wanted the decorative trim, you'll notice that it's included in the panel (Yay!).  We placed plenty of silicone on the wall AND the panel then placed them into the shower.
After we finished the bottom section, we did the same for the top section.  We needed to trim the top panel because of the window so we used a Makita 4" Disc Grinder with an all-purpose blade and trimmed off the top and the cut-out space for the Shampoo Shelf.
Once all the panels were up we used silicone to put the Shampoo Shelf in place.
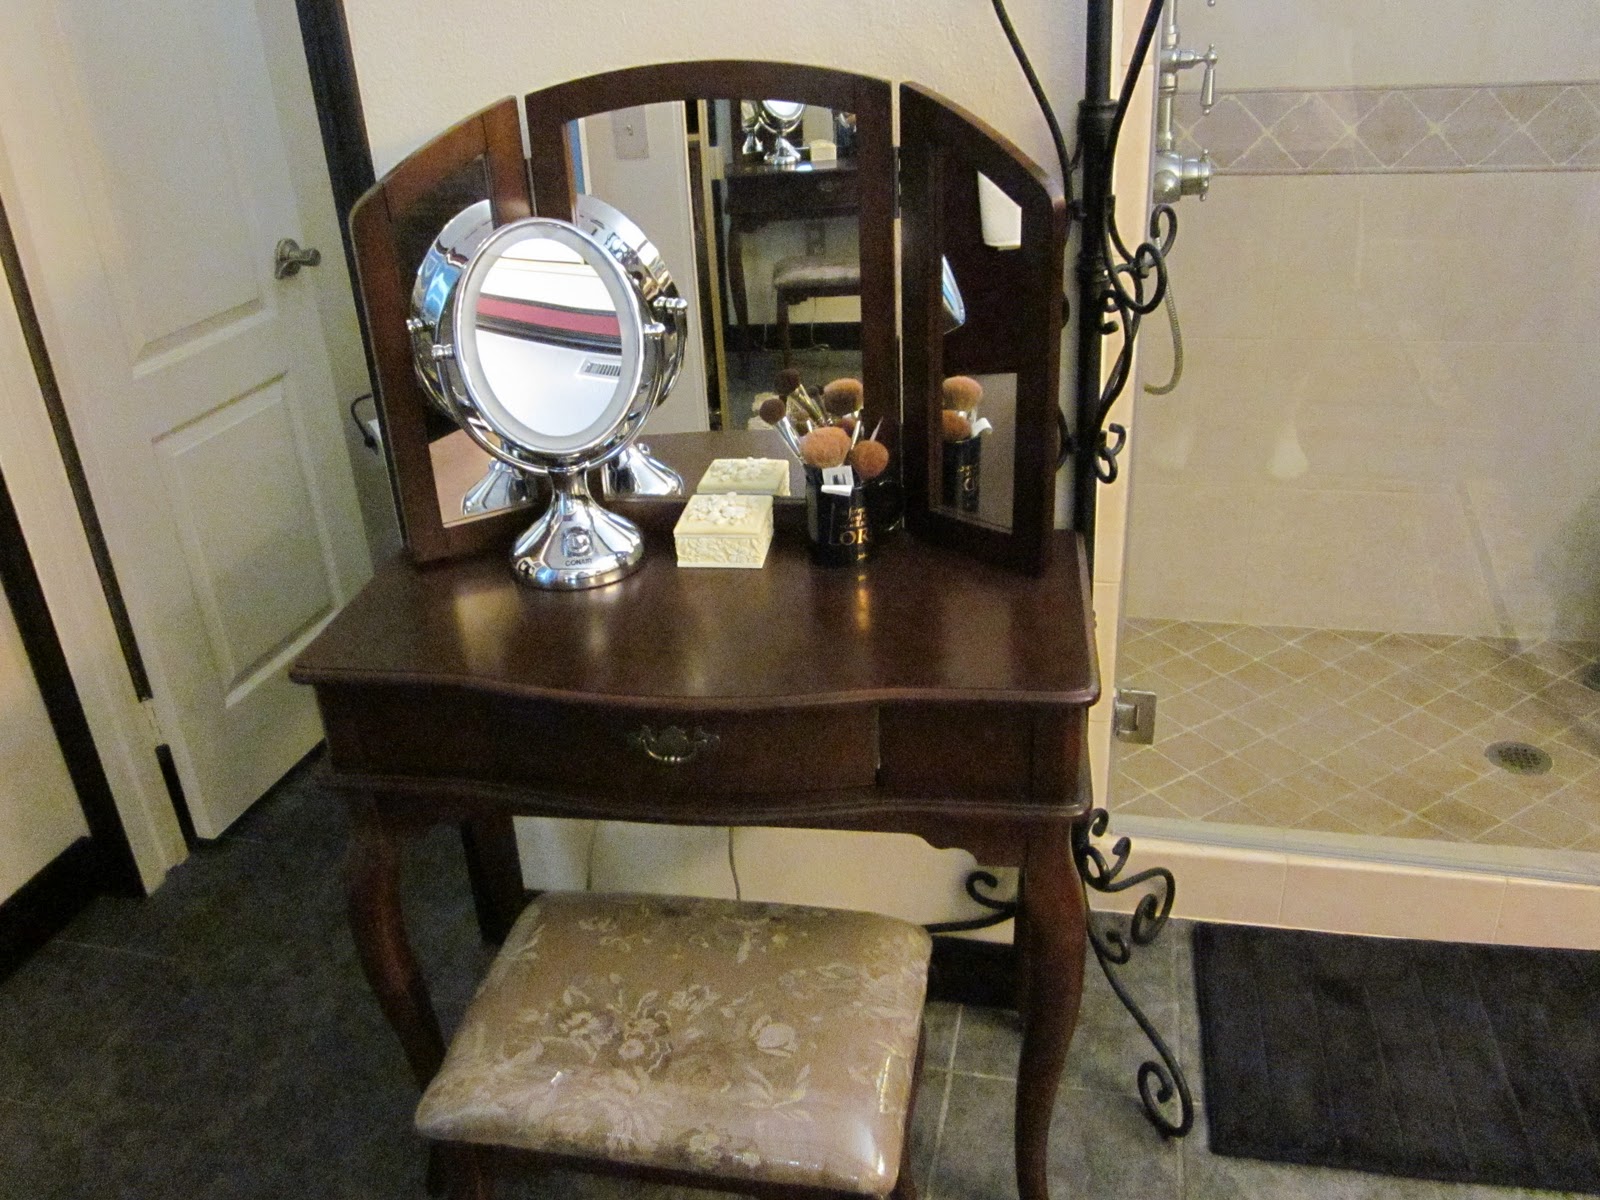
And since all the panels were up, this was a good time to connect the shower faucets.  We chose the Thermostatic Wall Mount with the Hand-held Shower (FYI, I am SO glad we got the Thermostatic! We set the shower temperature that we prefer and never have to touch it again unless we want to change the temperature!  Fabulous!).   We also drilled the hole for the steam shower temperature controller.
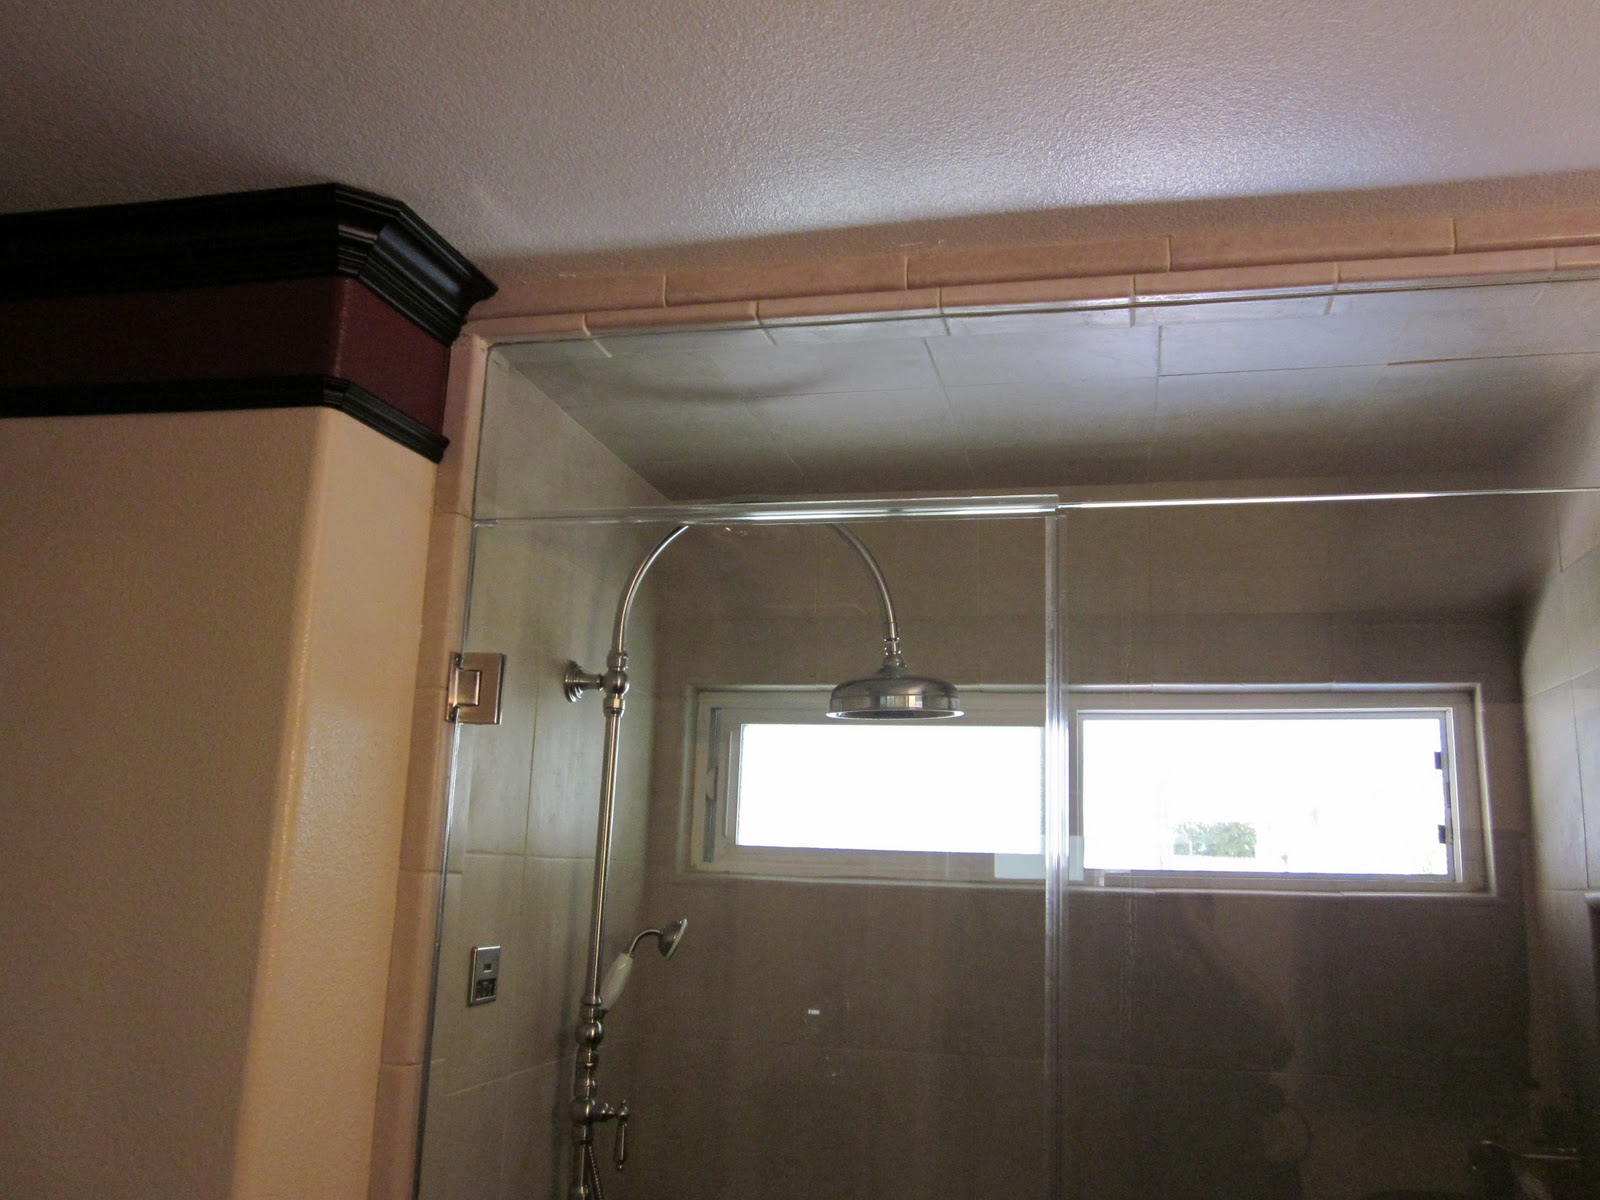
Next, we were ready to insert the bullnose edges around the shower.  Once again, silicone to the rescue!  We just started at the bottom and worked our way up...easy as pie!  Some of the bullnose needed trimming and we trimmed them the same way as we did the panels.  Since the window needed bullnose on the top as well as the bottom, we used Styrofoam (also found in the shower kit used to protect the product during shipping) to hold it in place until the silicone dried.
Now we were ready to install the glass doors.  We attached the hinges with the screws that were provided to the glass and then made sure the glass was level (we just placed a piece of wood underneath the glass), marked the location for the screws, drilled the holes and then screwed the hinges onto the bullnose.
The bottom hinge first and then the top hinge.
On the other side, the bullnose included a groove (important to remember when you're installing the bullnose) to which we added silicon and then inserted the glass.
At this point most folks would be finished with the shower and ready to grout.  For our grout, we  used ColorFast Siliconized Acrylic Tile and Grout Linen Nonsnd 10.

Because we decided to include a steam shower we still needed to adjust the ceiling since a steam shower ceiling should be at a slight angle (about a half inch).  That way, the water will be diverted from the outside wall.  We ordered an extra piece of glass for the top and extra tiles and bullnose to seal our shower and hold the steam in.  The folks at American Bath Factory helped us to determine what we would need.  While we waited for the glass to come in, we closed up the wall where our steamer was located leaving a space to get to the steamer when necessary.
As you can see, we used Styrofoam again (plenty in the packing materials provided) to hold the tiles in place, this time for the ceiling.  Amazing stuff, that styrofoam! ☺ Don't worry about that big hole in wall, we found a 15" x 15" SpringFit Access Panel at Home Depot before we cut the hole. Now we can get to the steam unit if necessary.

That's a wrap for the shower install. I can't believe we did it in one weekend! The next blog will include the top glass, the paint, and the remaining tile work. There's still plenty of work to do so I hope you'll check back.

Labels: , , , , , , , , , , , , , , ,

Wednesday, August 3, 2011

The Demolition

Yay! It's demolition time! Although it normally takes 2 to 3 weeks to order and receive a shower kit from http://www.americanbathfactory.com/, they just happened to have the one we wanted on hand (we knew it was meant to be). We have a guest bathroom so we're just going to take EVERYTHING out of the master bathroom at one time. They say we can install the shower in a weekend so we'll see if we can do it!  Time to grab the sledgehammer and don't forget to turn off the water!


This is where our vanity and wall mirror were.  Lesson number one...when removing the large bathroom mirror, be aware that they use mirror glue which leaves that lovely black residue you see in the picture.  It will need to be scraped off the wall and the wall will need to be retextured.  Lesson number two...when taking out a vanity that covers the floor and replacing it with a vanity that has legs, there WILL be bare floor!

Missing tiles after removing original vanity
Since we didn't have extra tiles from when the floor was originally put in (lesson number three...keep extra tiles) we had to find something close in color and texture. The up side is that they really won't show once the new vanity is put in so it doesn't have to be perfect. (Whew!)

The Shower
We had to run an electrical line for the steam shower (right side, behind the framework).  We ran it up into the attic (very small space since we have a two-story house but it was manageable) and over to the electrical box.  We used a 25' pvc pipe to pass it through the really tight areas which worked great!

Well, that's about it for the demolition, stay tuned!


Labels: , , , , , , , , ,

Saturday, July 23, 2011

The Chateau Collection

The Chateau Collection is SO beautiful...I want one of each!

For the shower, we decided on the 36" x 60" Single Grand Package Shower System (#P20-2435E-SN) which bought us a few more inches in width since our previous shower was 34".  We also ordered the Recessed Shampoo Shelf (#P20-3312E) which beats setting our "stuff" on the floor or the window shelf.  We decided against the Shower Bench because I'm handicapped and I often need a shower chair with handles.  We didn't need both.  We chose the Exposed Shower System with Pan Shower Head and Hand Shower in brushed nickle (#F746E-PI-H-SN) because my husband likes the shower over his head while I prefer using a Hand Shower. This is an amazing shower system since we can use BOTH units at the same time (water conservation! ha!) and my favorite feature is that we set the temperature once and then just turn the shower and/or hand shower on and off individually.  We never have to mess with the temperature unless we change our mind on how hot or cold we want our water...very cool!

Now for the vanity...instead of getting a wall-to-wall vanity, we chose the Mahagony 63" vanity (#P12-1402E-H-SN) with the Sistine Stone and Back Splash in medium stone with a dark stone accent.  We preferred the Metal Raised Bowls (looks like Old World Bronze) and the Gooseneck Back Splash mounted faucets.

We both liked the look of the Apothecary (#P12-1612E) which will add some diminsion to the room since it's 76" tall. With the shorter vanity and the apothecary, it will make our sinks closer and more intimate and will give us more storage space.  Since we plan to place the apothecary on MY side, we chose the Medicine Cabinet (#P12-1608E) for my husband's side. In the toilet area we decided to get the Wall Cabinet (#P12-1606E) to hang above the toilet.

With everything on order our next step will be the demolition.

Labels: , , , , , , , , , , , , , , , ,

Saturday, July 16, 2011

Getting Down to Specifics...

We looked all over the internet for ideas. We were already familiar with Sistine Stone (http://www.sistinestone.com/) which looks like real stone but isn't so costly. They have a showroom (http://www.americanbathfactory.com/) located right in our own backyard (okay, not literally in our backyard but in the same city)! We went to the showroom because we're both pretty visual and we knew they had displays set up. FYI, Sistine Stone looks like real stone but the similarities end there. It doesn't support the growth of fungi, mildew or bacteria which is a big plus in our book! It's also easy to care for and it's hypoallergenic, non-toxic and non-porous. Their shower kit is a real plus for us DIYers!

When we told them we were looking for a steam shower they brought out the catalog and we realized that we were at a 'one stop shop'! Yay! With the help of The friendly folks at the American Bath Factory we settled on the Amerec Steam Generator AK7 (http://www.amerec.com/) with Touch Control and Steamhead, ADK Series Automatic Drain Systems and Auto Drain Kit. We went ahead and ordered the steam unit and started looking at their showers in earnest.

We both agreed that we preferred the Chateau collection from their "high end showroom product line" Ahqua (http://www.ahqua.com/). It had the traditional lines and mahogany colors that we were looking for. We headed home, made some measurements, pulled up their website, and began to make our final decisions.

Labels: , , , , , , , , , , , , , , ,